How to Prepare and Load a Pulsed Field Gel Marker
Script
In this video, I will demonstrate how to use and load a pulsed field gel marker, or PFG marker. NEB PFG markers come in solid agarose plugs contained in syringes.
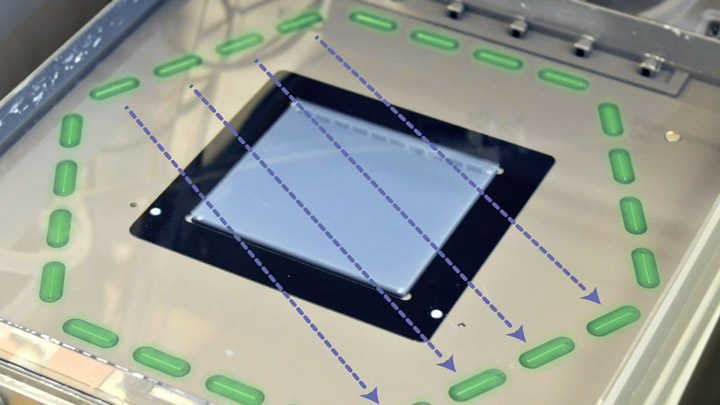
1. Make Gel for PFGE System
First, you will need to make a gel for your PFG electrophoresis system. We recommend making a 1 % agarose gel with a 0.5X TBE buffer.
For this, you’ll need a gel casting system compatible with your PFGE system and a water bath previously set at 60°C. This gel cast is 13 cm x 13 cm, which requires a 150 ml agarose gel solution.
In a 500 ml flask, add 135 ml of purified water. Then slowly add 1.5 g of agarose to the flask. Swirl the flask to disperse the agarose powder in the solution. Weigh the flask, then heat it in a microwave for 2 minutes. Weigh the flask again, and add water to return the flask to its original weight and mix well. Add 15 ml of 5X TBE buffer. Mix gently to minimize air bubbles. The agarose solution is then ready.
Transfer 4 ml of the molten agarose to a 15 ml conical tube and place it in a water bath at 60°C. This aliquot will be used later to seal the wells containing your PFG marker plugs.
Pour the remainder of the hot agarose solution from the flask into your gel casting tray. Let that gel cool down at room temperature until it is solidified. Usually, about 30 to 60 minutes.
Once the gel is solidified, remove the 4 ml aliquot from the water bath and let it cool at room temperature for about 4 to 5 minutes while you load your solid PFG marker plugs into the gel.
Do not let the agarose solidify as you will need this agarose to be in a liquid state to seal the wells.
However, it is important that the agarose not be too hot as it can melt the plugs in the wells.
2. Load Ladder on Gel
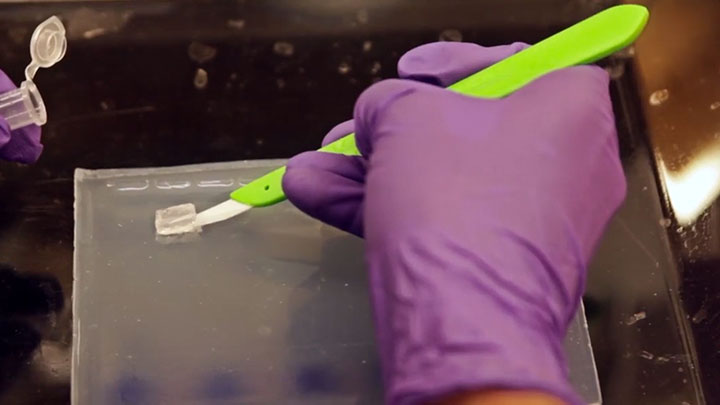
To load the PFG marker plugs, remove them from the freezer and extrude the agarose from the syringe carefully. Slice a plug from the end with a sharp, clean blade. The thinner and flatter the plug is, the better. We recommend a plug size between 5 and 10 µl. For reference, a 10 µl plug corresponds to one small graduation on the syringe volume scale.
Place the plug at the front of the well, by carefully pushing it with the clean pipette tip. Then seal the well with the molten agarose, which is now just above gelling temperature.
Be careful to avoid introducing air bubbles in the wells. If the molten agarose is too hot when you seal the wells, the heat will cause the Lambda concatemers to denature, which can result in an abnormal band pattern, so it is important to cool down the molten agarose before sealing.
After sealing the wells, let the agarose solidify for about 5 minutes at room temperature. Once the wells have solidified, your gel is ready to be run.
Insert the gel into your PFG system, containing cooled 0.5X TBE running buffer.
3 Load Samples and Run Gel
Load liquid DNA samples and run the appropriate migration program.
4 Stain Gel
When the migration is complete, remove the gel from the PFG system and stain it with your preferred visualization dye. Now you are all set to capture an image of your gel.
Contact our Technical Support
If you have any questions, please contact our technical support scientists by phone or by emailing info@neb.com. We’re always happy to help.
Related Videos
-
How to Prepare and Load a Standard DNA Ladder -
What is Pulsed Field Gel Electrophoresis? -
Monarch® DNA Gel Extraction Kit protocol